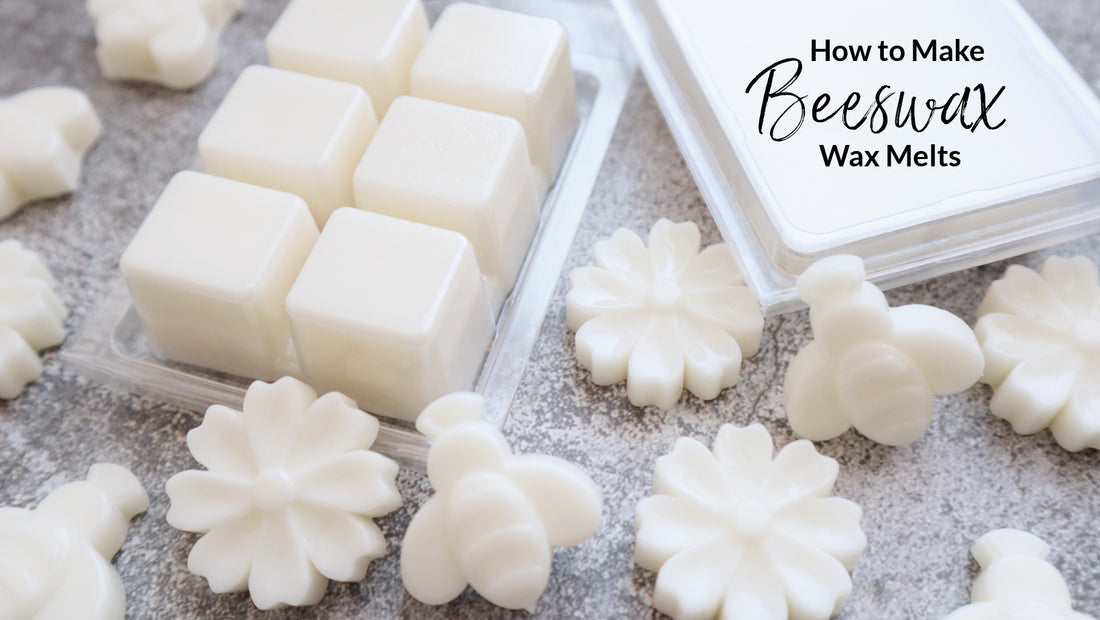
Finding all natural wax melts in the store is nearly impossible. If you're trying to avoid synthetic ingredients in your wax melts, the best way is actually to make them yourself! Fortunately, making your own melts is incredibly easy and you only need a few supplies. Follow along as we make these easy essential oil wax melts with beeswax!
Natural Wax Melt Ingredients
Making your own melts means you have complete control over all the ingredients. Not only that, making them at home is also more cost effective. You can get creative with tons of different essential oil blends, so the possibilities are endless too!
One of the main reasons you can't find essential oil wax melts in the store is most likely that essential oils are expensive. To make strong-smelling wax melts, you need a lot of oil. Making wax melts with essential oils will be more expensive than using fragrance oils. However, it's still more affordable than buying them from the store (if you could even find them in the first place).
To make your own natural melts at home, you will need:
- Beeswax
- Carrier oil
- Essential oils
Beeswax
Beeswax is one of the only waxes that can truly call itself all-natural. Although beeswax undergoes some processing to make it usable, it doesn't contain any additives or other ingredients. Beeswax comes in slab form as well as pellets. We highly recommend using beeswax pastilles because they are much easier to work with and don't require cutting.
Carrier Oil
Coconut oil is a helpful ingredient for making your wax melts softer. If you were to make 100% beeswax wax melts, they would be rock hard and take forever to melt in most wax warmers.
Many types of oil would work. Whichever one you choose, make sure it is the refined version rather than unrefined. Refined oils undergo processing, which helps remove the natural scent of the oil. Because essential oils have a lighter aroma when warmed (more on that later) you don't want to make them compete with the oil's scent.
We don't recommend using higher end carrier oils sought after for their skincare benefits. Because you won't be using these on your skin, any such benefits would be a waste when making melts. The oil's only purpose is to soften the consistency of the wax.
Essential Oils
To make all natural wax melts, you will want to use essential oils. Although they smell wonderful in diffusers, essential oils do not work quite as well as fragrance oils in wax melts. This is because essential oils do not have additives that improve their scent throw like fragrances. However, you will need them if you are trying to use all natural ingredients.
Some companies advertise their fragrance oils as all-natural; however, almost all fragrance oils contain synthetic ingredients. Contrary to popular belief, this isn't necessarily a bad thing because not all synthetic ingredients are harmful. When choosing fragrance oils, you can always look at the SDS to learn about ingredients with potential health effects. Learn more about all-natural fragrances in our blog.
When making essential oil wax melts, keep in mind you won't necessarily reap the same therapeutic benefits. While you can warm essential oils, most people will say that diffusing your oils is more beneficial. However, there's nothing wrong with using essential oils for wax melts.
Also keep in mind that you need a lot more essential oil when making wax melts or candles than you would for a diffuser. You only need a few drops in a diffuser. However, you will need to measure your oils in milliliters or even ounces to get a strong scent from your wax melts. The amount needed ultimately depends on how many melts you want to make.
How to Make Essential Oil Wax Melts
Now that you are familiar with the ingredients for beeswax melts, it's time to start making them!
Choose a Mold & Calculate Ingredients
The most important step is to choose your mold and decide how many melts to make. These factors determine how much wax and oil you need.
You can use classic wax melt clamshell molds, mini silicone molds, or metal tart tins. Check the product listing to see how much wax a mold will hold. For this tutorial, we're using classic clamshell molds, which hold approximately 2.25 oz of wax each.
After determining how much wax your mold holds, you can calculate the amount of beeswax and carrier oil to use. You need a mix of 60% beeswax and 40% carrier oil for an ideal consistency. For example, if I'm making 6 clamshell molds, I need 13.5 oz of mixture to fill my molds. This calculates out to 8.1 oz beeswax and 5.4 oz carrier oil.
The amount of essential oil also depends on how much wax you're using. You will need anywhere from 3% to 6% essential oil in your recipe. For a 13.5 oz batch of wax melts, 3% would be 0.4 oz (about 12 ml) of essential oil. A 6% scent load would be 0.8 oz (about 24 ml) of essential oil.
Starting with a small amount of essential oil is a good idea. You can always re-melt your wax and add more later if it doesn't smell strong enough.
Gather Other Ingredients
In addition to molds, beeswax, carrier oil, and essential oils, you need a few extra supplies:
- Gloves
- Scale
- Thermometer
- Mini whisk
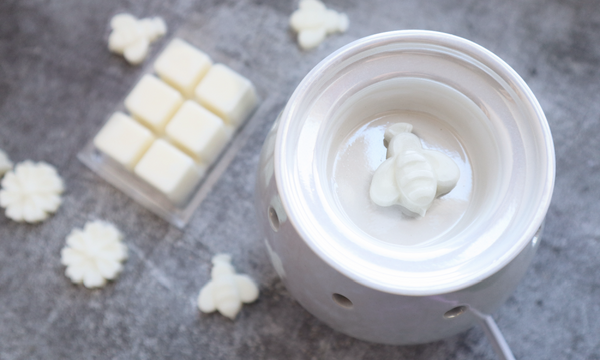
- Wax melting pot
- Saucepan
- Pot holders
- Pipettes
Step-By-Step Instructions
- Put on gloves and create a clean workspace. We recommend laying out your molds so they're ready.
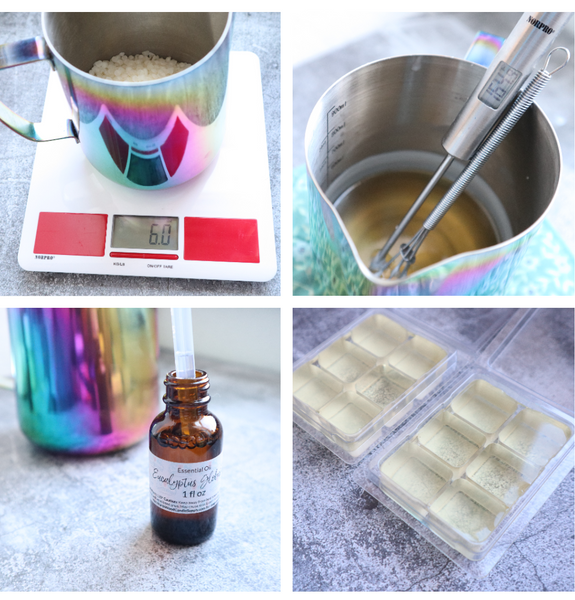
- Place your wax melting pot on the scale and tare it to zero.
- Weigh out your beeswax and carrier oil in the wax melting pot. If using an oil that's solid at room temperature, you can melt it first to make measuring easier.
- Fill a saucepan about 1/4 of the way full with water, then place it on the stove.
- Put your wax melting pot inside the saucepan - this is a double boiler.
- Begin heating until the beeswax melts. Stir with a whisk to help it heat evenly and melt faster.
- Carefully remove the pot from the heat once fully melted. Use pot holders, as the metal will be hot.
- Use the thermometer to check the temperature of the wax. Let it cool to approximately 155 to 160 degrees F before adding the essential oils. Adding the scent at a higher temperature can affect the aroma. However, you don't want to let it get too cold or the wax will begin hardening in the pot.
- Once the wax has cooled to the right temp, use a dropper or pipette to add your essential oils. For a large batch, we recommend measuring your essential oils by weight using the scale and a measuring beaker.
- Stir the mixture with a whisk to blend the essential oils.
- Pour the wax into your molds and let them cool.
Fun Variations for Beeswax Wax Melts
Beeswax naturally has a beautiful glossy appearance. However, you can also decorate your natural wax melts to make them stand out. Here are some ideas:
- Add some mica powder to tint your wax. You can add mica at any time once the wax has melted in the pot. Mica tends to sink, so you'll want to stir before pouring each melt.
- Make fun shapes with silicone molds. Shaped wax melts are cute on their own. However, you can also embed them into larger wax melts. Simply place an embed on the surface of the wax melt when the top layer is just about to set up.
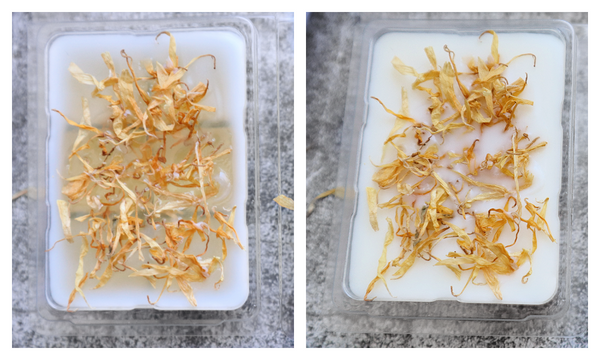
- Sprinkle dried botanicals on top of your melts before they cool. Dried petals are perfectly safe to use in wax melts and boost the natural vibe. Follow our botanical wax melt tutorial for more tips!