
If you make candles, you've probably heard the term "repour" and might be wondering what it means. To repour means simply to pour again. However, what does that mean in the world of candle making? Read on to learn everything you need to know about repouring candles.
Why repour candles?
Repouring a candle is when you add a thin layer of melted wax to your candle after it cools. This is sometimes called a second pour. You do this to smooth out the tops of your candles and make them look better. You only need to repour candles if they have an uneven surface after cooling or if the wax shrinks away from the walls of the container.
It's somewhat common to end up with a divot or indentation around the wick after the wax cools. Divots form when the wax cools at an uneven rate. While this can happen under many circumstances, indentations are more likely to form if you pour your candles in a cold room. Wax is also more likely to pull away from the walls of your container in cold temperatures.
If you've ever watched wax cool, you'll probably notice that it tends to harden around the edges of the container and wick first. Meanwhile, the wax at the center of the candle cools more slowly. Because wax contracts (gets smaller) as it cools, it can pull the rest of the wax inwards to create an indentation.
Below is an example of uneven wax shrinkage after cooling. The darker areas in the wax show a mild divot.
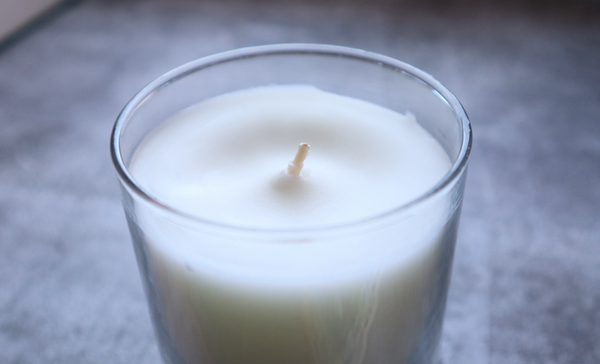
Divots don't usually impact how your candle burns. However, they can make your candles look sloppy. You usually repour candles for aesthetic purposes.
Note: You can also use a heat gun to smooth the tops of your candles. A heat gun is best for fixing minimal surface issues, while repouring is best for deeper divots.
Repouring to Fill Sinkholes
In most cases, you'll do a second pour to smooth out uneven tops. However, you can also repour if your candle ends up with sinkholes. Unlike divots, sinkholes are pockets of air trapped in your wax after it cools.
Sinkholes may only appear after you melt the top surface of your wax with a heat gun. Once exposed, sinkholes can create a large empty pocket in your candle. Instead of starting over from scratch, you can wait for the candle to cool and do a second pour just as you would for divots.
Does all wax require a second pour?
Certain waxes are more likely to form uneven surfaces than others. In general, soft waxes usually create smooth tops on the first pour. Because of this quality, such waxes are often called single pour waxes. Blends like Ceda Serica, CB2, and EC-26 are popular because they almost always create smooth tops in candle jars.
Hard waxes like beeswax, pillar wax, paraffin, and blends with a lot of paraffin are more likely to give you uneven tops. This is because hard waxes tend to cool more quickly, which can cause bigger indentations. Pillar blends are actually intended to shrink when they cool so that you can release your candles from the mold better. However, this can also increase the chances of uneven tops.
Soy wax falls somewhat in the middle. Some soy candles may require a second pour. However, it can vary depending on things such as the room temperature and pour temperature.
How to Repour Candles
If working with a wax that needs a second pour, it's a good idea to melt extra wax so you have some left over. Not only does this reduce prep work, it also ensures that the newly poured layer has the same scent and additives.
Here's how to do a second pour:
- Pour your candles as you normally would.
- Let them harden completely. Don't trim the wicks yet, as the second pour can affect the trim length.
- Melt your leftover wax and let it cool to 150 to 160 degrees F (see note below).
- Pour a thin layer of wax into your containers, covering any divots.
- Let the wax cool again. You can then trim your wicks.
Note: Pouring too hot can cause too much of the wax in your mold/container to re-melt. At the same time, you want to avoid pouring wax that's too cold. If the wax is too cool, it might not bond with the surface later and may cause visible lines.
As with any candle project, it's a good idea to make a test candle before making a large batch. Not only will this help you choose the right wick, it will help you see if your wax needs a second pour.
Can you melt and repour candles?
Repouring candles mostly relates to adding a layer of wax to the top of your candles to smooth them out. However, you might be wondering if you can repour a candle from scratch. The simple answer is yes. However, it's a more involved process.
Melting and repouring a candle might be necessary if you used the wrong wick or you forgot an additive. To start a candle over from scratch, you will need to warm the container to remove the wax.
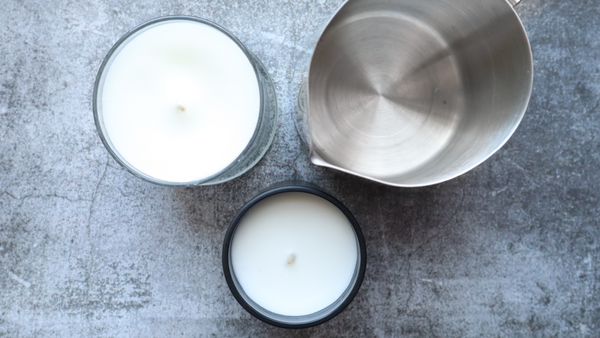
An easy way to do this is to place the candle in a saucepan filled 1/4 full with water and heat it on the stove like a double boiler. Once the wax softens around the edges, you can pop it out and return it to your wax melting pot. Use caution, as the container will likely be hot from the boiling water.
For best results, be sure to clean the container. As long as the wick is intact, you may be able to reuse the wick when you pour the candle again.
Looking for help with other candle making terms? Check out our Candle Making Glossary for a huge list of helpful definitions!